It has begun. It is in full swing and it’s not a moment too soon, this room is a changing. I need to start by saying, this room needed an intervention. I was well aware of that for a while, but like most things requiring an intervention, I was avoiding the reality, I had put it on the back burner so many times I eventually lost my motivation. My excuse? Well, I don’t have one. Other than the old proverbial there are not enough hours in a day, or some other cop out.
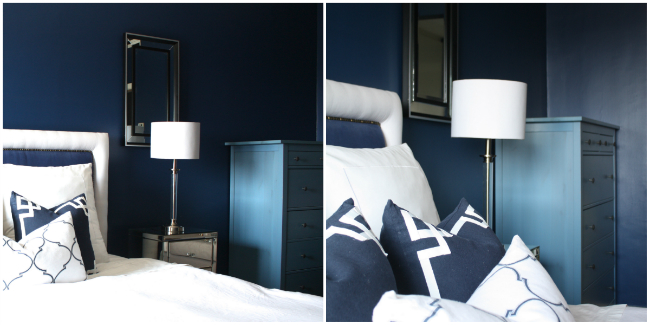
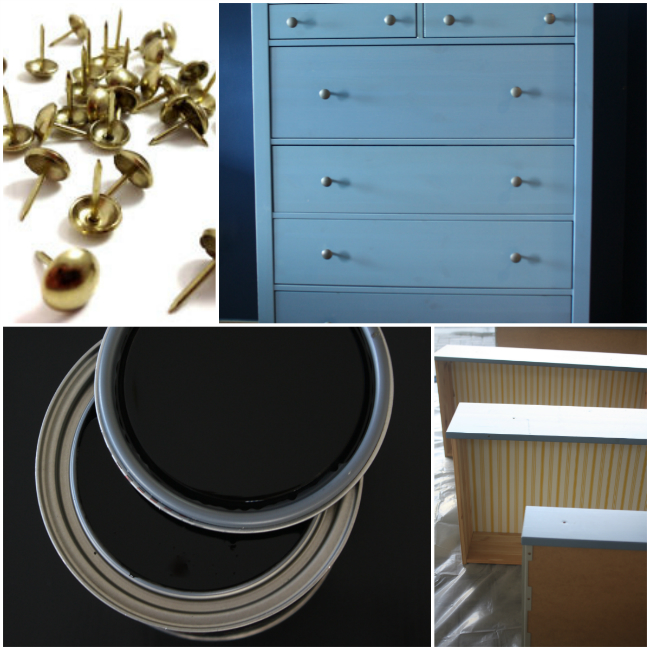
I decided to start off with what I considered the largest eye sore. The pale blue Ikea Hemnes cabinet, which was orginally used in my sons nursery and had ended up in my room by default, and did not co-ordinate at all with what I ultimatelty want to achieve . I do use it for extra drawer space so it has a purpose, but man was it all shades of wrong.
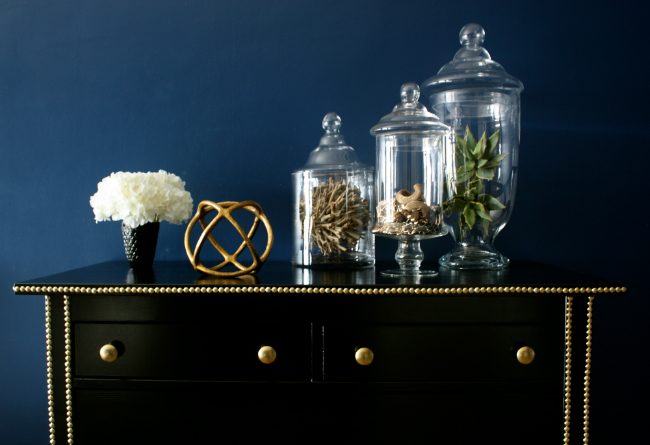
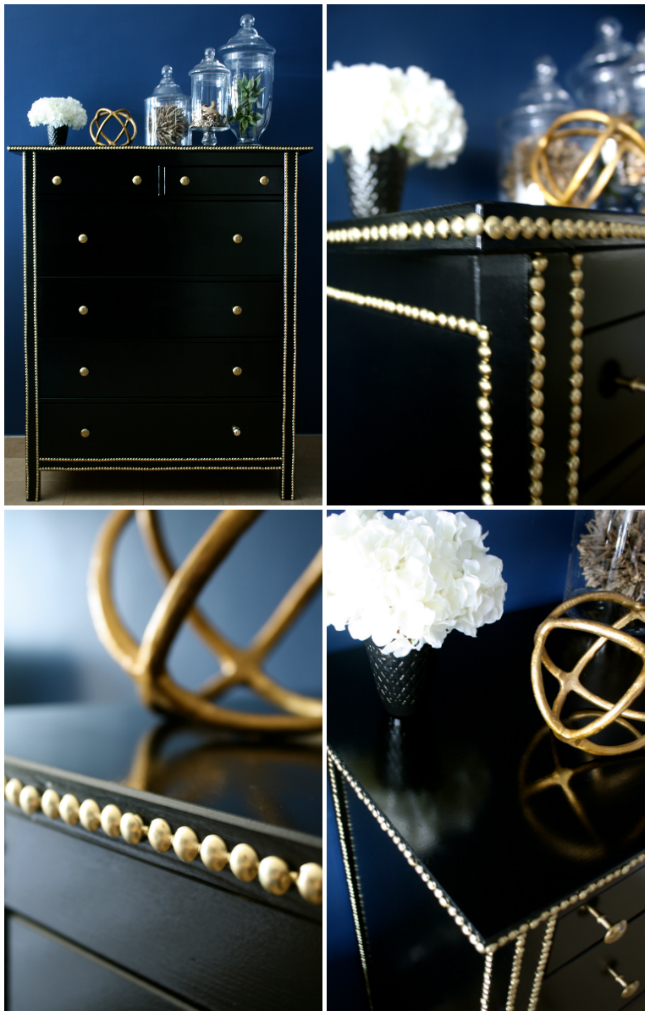
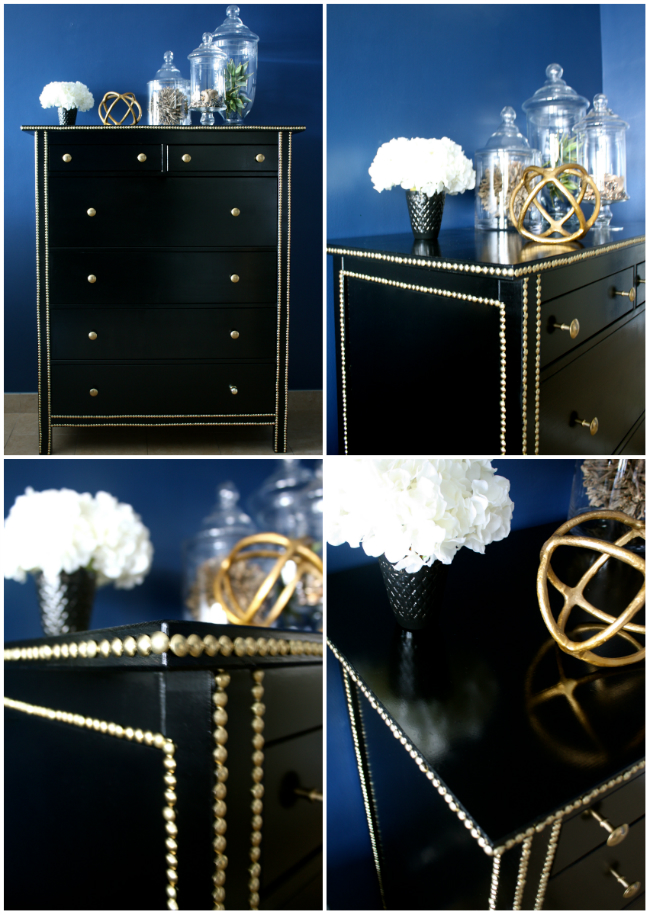
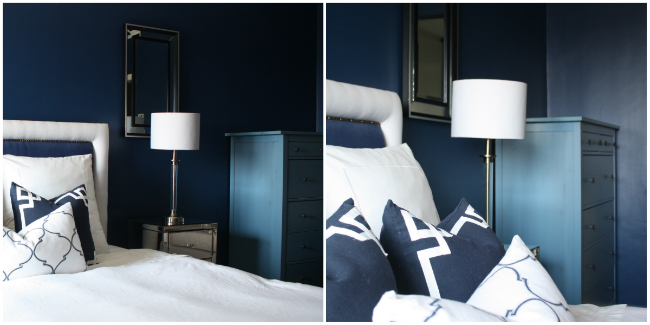
I decided it would be given a vamp-over, taken from baby blue to black. Goodbye baby, hello boudoir. I was not going to leave it there, the cabinet was going to get a little spice by adding gold. In the form of gold upholstery nails.
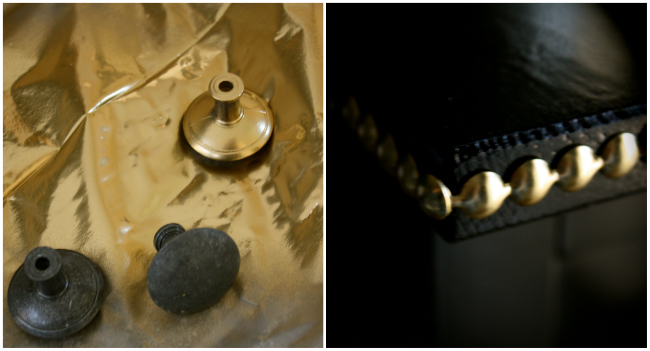
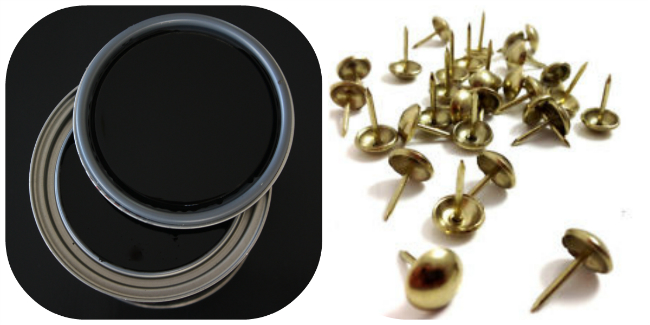
As far as the painting, I wanted high gloss. The kind only professional spraying would yield, but seeing as that was not an option due the fact that this room make over has to be done on the el cheapo, I decided to give the two in one Rust-oleum spray paint a whirl on this project. Now high gloss it was, I give it that much, but much to my dismay I could not get it even. I could see the stroke marks and that’s not something I could live with. Plan B? Gloss enamel paint. After sanding the spray paint layer, I was much happier with the finish of the enamel paint. I also gave the antique silver knobs the once over with Ace Metallic Gold spray paint. Once I had given the cabinet sufficient time to dry I attacked step two. The nails.
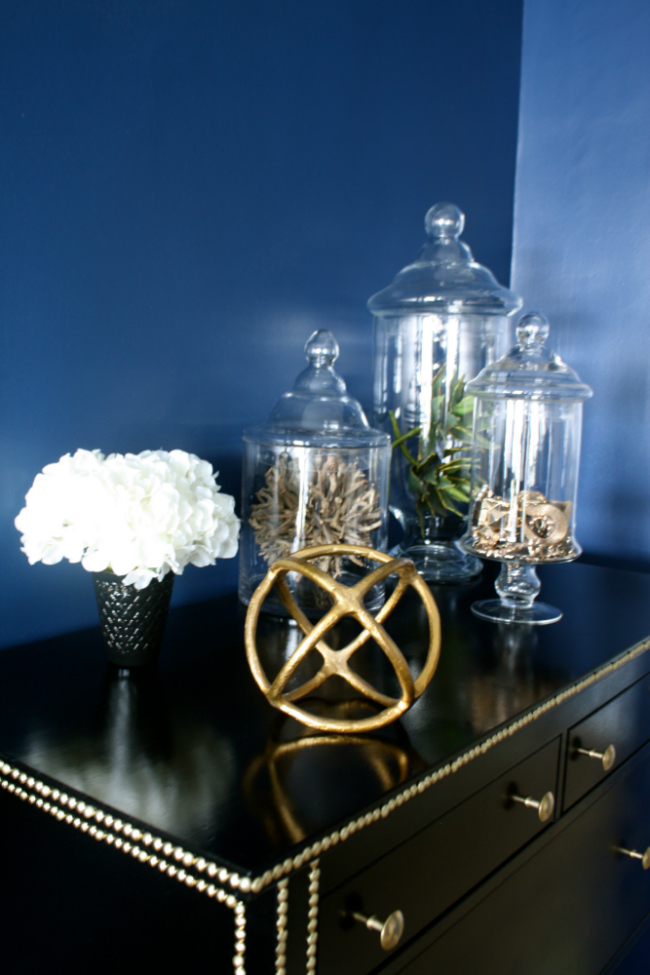
It has to be said I have never used upholstery nails myself, but thought how hard can it be right? For the most part, it wasn’t. Well, other than the session where I hit my finger with the hammer and stood on a upholstery nail, that occasion was dotted with expletives! The thing that concerned me most was keeping my line straight, a skew line in not a good line. This can be a challenge but I followed the line of the edge of the cabinet and that kept me on track. I love how the studs take the cabinet and give it it’s sexy back! Don’t you think?
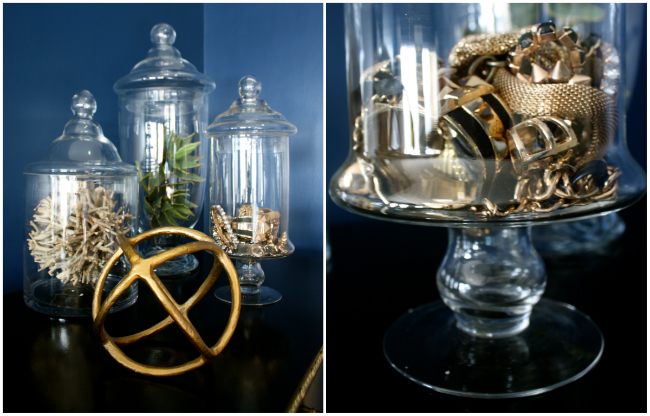
The jars I had bought a while back and had them in my office waiting for their resting place to be complete.
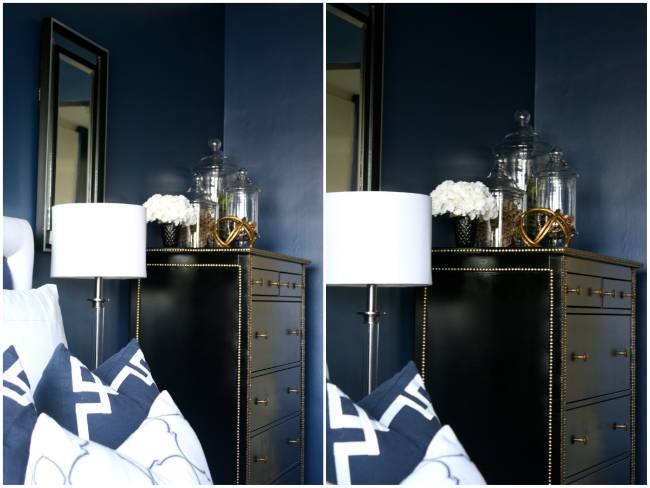
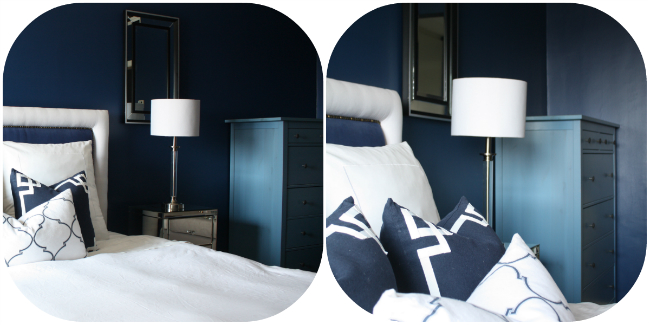
Quite an improvement right? I am now totes motivated to get this room done and am excited to bring you stage two!
If you missed my inspiration post on colour and using animal print do have a look, as that is step two of the Master plan!
The best part of stage one? I no longer walk into my bedroom and cringe at the sight of that blue cabinet!
Stayed tuned for stage two of Project Master.
This DIY project was featured on Apartment Therapy!
Linking with Thursday Style / 504 Main / Redoux / Miss Mustard Seed / Inspiration Gallery / Remodelaholic / 36 Avenue / Spotlight Saturday / Delineate Your Dwelling / DIY Show Off / Carrie This Home / Thrifty Decor Chick / Upcycled Treasuers / Savvy Southern Style / Woods of Bell Trees / Nancherrow / Liz Marie Blog












50 Comments
Ooooh, very nice. Well done!
Thank you Kath! Appreciate that!
This is stunning, especially with that nailhead trim detail! Pinned 🙂 I’d love it if you linked up to The Makers link party going on right now, hope yo see you there!
http://upcycledtreasures.com/2014/02/the-makers-link-party-6/
Thank you Katie! Will link up, Jacqui
WOW – WOW – WOW – Gorgeous makeover – just beautiful –
I’m trying to persuade a client to let me spray paint her knobs gold for her dresser which I’m painting black
and she doesn’t want the gold – I think I should show her this –
Gorgeous!
Visiting from Classy Clutter
Thank you Suzan! I think the gold works, gives it a bit of glam! Hope your client goes for it! Jacqui
This is beyond gorgeous! Love Love Love! I saw it linked up on my DIY Craft Group Board on pinterest. Would love if you linked up at my link party tomorrow morning…. Link It Or Lump It at SohoSonnet (dot) com
Hi Sonnet, thank you! I will definitely link up 🙂
What a sexy space! That dark paint color paired with dark dresser is stunning and sultry. I cant wait to see how you finish the room!
I found you through DIY show off. Im following you on your social media and want to invite you to follow back! We really should be friends!
Thank you Corinna, that’s the look I’m aiming for! Keep posted for the room updates! Coming soon! Jacqui
Hopping over from DIY show off… Oh, boy! I am so glad I did! This dresser is absolutely stunning!
I’m glad you did too Sherry! Thank you! Jacqui
Gorgeous as always!! I absolutely love the transformation! Wow!
I am obsessed with your new master choices. I think the blue, black and animal print are stunning together. Can’t wait to see everything!
Thanks Angela! Appreciate that! 🙂 Jacqui
Wow-wee! This looks like a really expensive piece of furniture now. Love it! Thanks for linking up at The Makers! Pinned!
I’m glad you like Corey! Thanks for stopping by and for the pin! 🙂
Oh my! I can’t believe that is the same dresser. It’s mega elegant! LOVE!
Thank you Heather and thanks for stopping by, Jacqui
You did such a great job with this, I made sure to pin for some inspiration!! You take such great pictures of your crafts, pretty impressed!!
Thank you for the compliment Courtney, I quite enjoy the photography! And thank you for pinning! Jacqui
Very cute!
Thanks for joining the Link Up this week! 🙂
Thank you Jess! Jacqui
Wowza! What a makeover! Totally impressed.
So nice of you, thanks Alexis. Jacqui
So gorgeous! I’m so excited to feature this fabulous transformation on Thursday STYLE tomorrow! I love absolutely everything you do, and I can’t wait to have you link up again this week 🙂 Major congrats on being featured at Apt Therapy lady!!
Thanks so much for your kind words Angela, I so appreciate it! And thank you for the feature on Thursday STYLE! I love your blog, so happy to feature on it! Jacqui x
What a stunning end product! You did an excellent job. Thanks for sharing at our link it or lump it party this week.
Thank you for the opportunity to link Amy and thanks for stopping by! Jacqui
The dresser looks fabulous! It really does bring the sexy back! I have a very similar blue color in my master bedroom as well and I really love it. I love your style and I’m so glad you shared this with our Frugal Crafty Home readers!
The first thought that came to mind was WOW! That is such an incredible transformation! The upholstery nails really took it over the top. Great job!
I love the upholstery nails too Katie! Thank you!
Such a cool transformation! Way to go from basic to ba-bam! Would love for you to share at Fridays Unfolded!
Alison
Nancherrow
Will do Alison! Thanks for stopping by! Jacqui
[…] Life in Velvet’s Pick: PROJECT MASTER […]
[…] Project Master Ikea Hack – Brooke Eva […]
[…] picked this great dresser revamp from Brooke Eva – can you believe it used to be baby […]
My mind is officially blow! This is one of the BEST Ikea hacks I have ever seen. Pinning and sharing! And I am looking forward to following you on social media!
Thanks for the lovely comment Tasha! Appreciate that! Jacqui
Love, love, love this piece! I have so been wanting to do something with nailhead trim! I’ve gotta get on it!
I’m sure what ever you do it will be stunning Jenna! Thanks for stopping by, Jacqui
[…] Revamped Ikea Dresser […]
[…] And I bet you would never have guessed that this dresser is from IKEA! Jacqui from Brooke Eva inherited it from her son’s nursery and rather than getting rid of it she turned it into a beautiful dresser with gold detail! […]
[…] This Hemnes dresser is reinvented with a gloss black + nailhead trim treatment by Brooke Eva. […]
[…] Link==> http://brookeeva.com/project-master/ […]
[…] 9. Black Lacquered Gold Studded Ikea Dresser Hack […]
[…] And I bet you would never have guessed that this dresser is from IKEA! Jacqui from Brooke Eva inherited it from her son’s nursery and rather than getting rid of it she turned it into a beautiful dresser with gold detail! […]
[…] 4.DIY Studs Dresser Makeover at Brooke Eva. […]
[…] dresser via Brooke Eva is a stunning example of bringing high style to a very basic previously tame piece. Think outside […]
[…] 4.die DIY Studs Dresser Makeover BrookeEva. […]
[…] searching the web and researching a bit about them, my mind has changed. 1 // 2 // 3 // 4 // 5 1. Design Manifest: Naomi from the wonderful blog Design Manifest added […]